
Cello String Crossings: The Bow’s Natural Tendencies
GRAVITY AND CENTER OF GRAVITY. HOW DOES THE BOW “FEEL” ABOUT STRING CROSSINGS?
Even though the bow is an inanimate object it does however have its definite preferences when it comes to string crossings. Going against the bow’s wishes is definitely possible – and very often unavoidable – but we can make life much easier for ourselves if we apply a little intelligence to the understanding and respecting of its wishes (natural tendencies). Of course, the bow has no real “wishes” or “natural tendencies”. These are simply the effects of gravity and motion, which produce forces that we can either use to help us, or that we must work against.
To use a sporting analogy, using the bows momentum, weight and centre of gravity to help us, is the equivalent of swimming with the current, sailing with the wind (downwind), running downhill, or of a judo fighter using his opponent’s weight and momentum to make him fall etc. What then are these “natural tendencies” derived from gravity (bow weight), centre of gravity (balance), and momentum and what is their effect on string crossings? Before we look at this question however, it is important to take into account the fact that the more horizontal the cello’s position is, the greater the effect gravity will have on the bow’s string crossings. And, for the same reason, the more vertically we have the cello, the less effect gravity will have on these same string crossings.
Let’s start by finding the centre of gravity of the bow. When the bow is perfectly balanced on a finger inserted between the hair and the stick, that finger is at the bow’s “balance point”, or in other words, at its centre of gravity. Because the frog is the heaviest part of the bow, the bow’s centre of gravity is much closer to the frog than to the middle of the bow.
When the bow is resting on the string at its centre of gravity, it doesn’t want to “tip” either “up” to the left (towards the higher strings) or “down” to the right (towards the lower strings). However, as we draw the bow’s point of contact (with the string) gradually further away from this centre of gravity, the bow has an increasing “desire” to “tip”, one way or the other depending on which side of its balance point it is touching the string. If this point of contact with the string is closer to the frog than the balance point, the bow will want to tip (fall) towards the higher strings. If, on the contrary, the point of contact with the string is more towards the tip than its centre of gravity, the bow will want to fall towards the lower strings. The farther the point of contact is away from the centre of gravity, the greater is this desire to tip (fall).
Because the centre of gravity is closer to the frog than to the middle of the bow, in the greater part of the bow (from the centre of gravity to the tip), its natural tendency is to want to fall towards the lower strings. The weight of the bow-arm also follows this same tendency in the sense that the further out we are towards the tip, the greater the natural desire is for the arm to fall down towards the lower strings. But this occurs only when we get out past the centre of gravity. On the frog side of that balance point, the tendency is the opposite and the bow will want to tip towards the higher strings.
The effect of “momentum” is identical. A downbow is going in a direction in which the gravitational forces pulling the bow down to the lower strings are always increasing and vice-versa for the upbow. Let’s look now at the detailed practical implications of this for both the downbow and the upbow.
As we draw the bow out to the right past its centre of gravity, the bow starts to want to “fall” to the right of the string (i.e towards the lower strings). The further out our bow is past this centre of gravity (in other words the further out the bow goes towards the tip) the greater the mass (weight) of bow there is to the right of the point of contact (between bow and string) thus the more it wants to “fall”. For the upbow, the situation is perfectly inverted: now, as we come towards the frog from the tip, the tendency of the bow (and arm) to want to “fall” towards the lower strings is progressively reduced. At the centre of gravity, this tendency is zero, but as we pass that point and go towards the frog the tendency is now to want to fall toward the higher strings and this tendency increases exponentially as we go towards the frog thanks, to the leverage (fulcrum) effect.
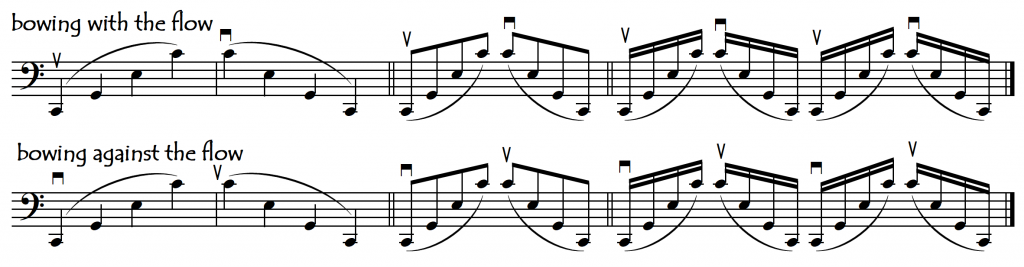
Thus, in conclusion, due to the influences of gravity, centre of gravity, and momentum, a downbow naturally wants to “fall” in the direction of (towards) the lower strings and an upbow naturally wants to “fall” in the direction of the higher strings.
CHORDS
Chords are nearly always played starting from the bottom, and most chords are played on a downbow, which means that for cellists (but not for violin/violists), the string crossing direction in chords is the “unfavourable” “anti-natural” direction. This is neither fortunate nor unfortunate, just a curiosity, and the reason why gentle, spread chords on an upbow are such a delight to play (see the Sarabandes from the Bach Cello Suites).
THE ELBOW IN STRING CROSSINGS
For a smooth string crossing, it is the elbow that leads, actually anticipating the bow-level change and thus leading the hand and forearm to the new string in a flowing, rounded movement. To experiment with (and illustrate) this phenomenon, try playing some spread, four-string chords. The first chord of the soloist’s entry in Haydn’s C major Cello Concerto is an excellent example. While crossings to adjacent strings can usually be done quite economically (with little movement) with the hand and wrist, the addition of the elbow movement – even though not strictly necessary – adds flow, energy and looseness to the bow movement and thus makes the playing gesture more attractive (more dance-like). In leaps across several strings, however, the elbow’s contribution is not just cosmetic: now it becomes essential.
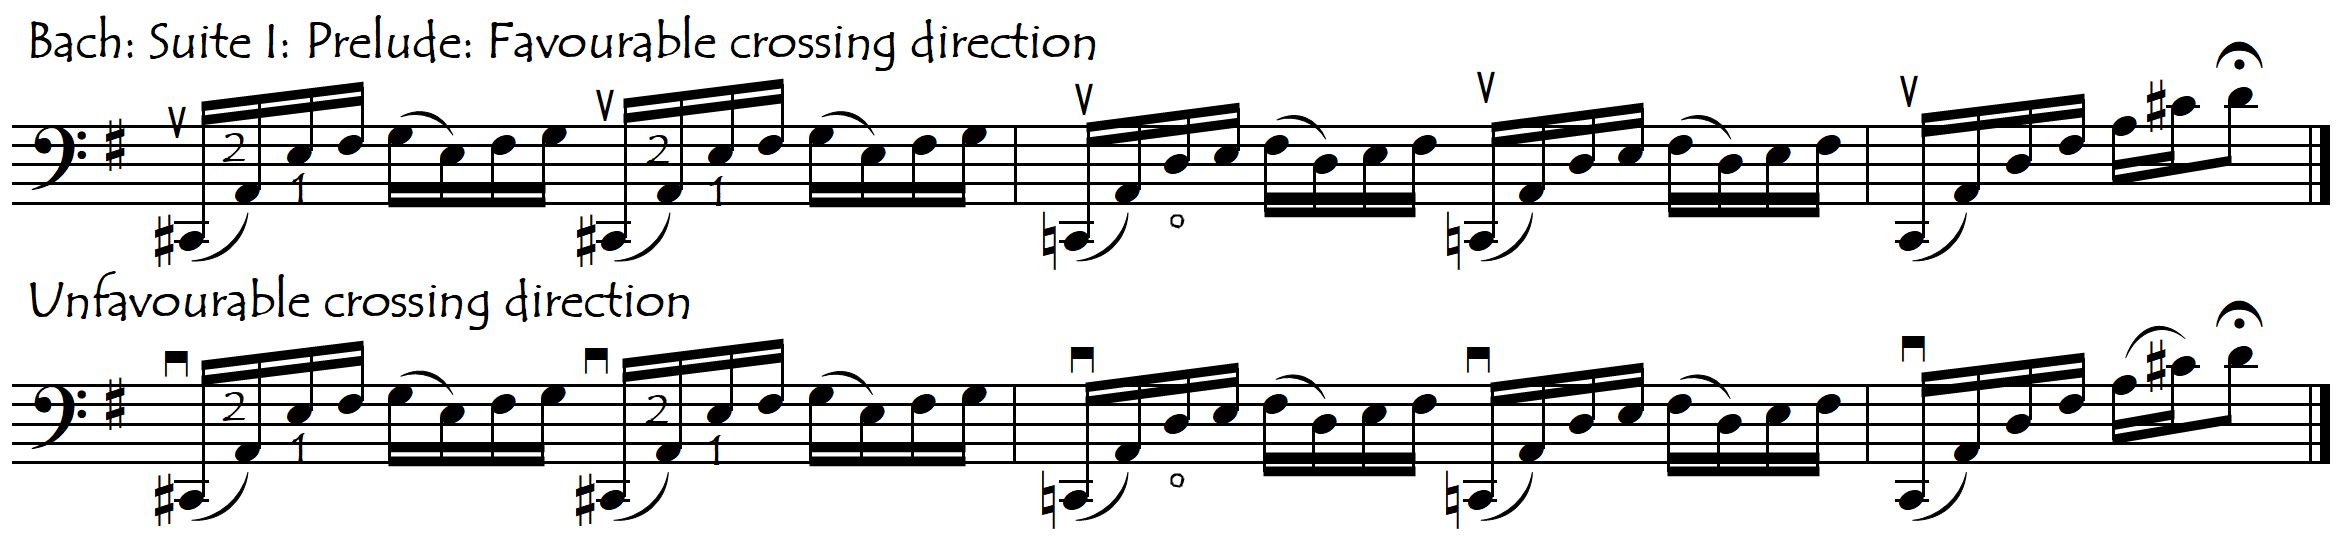
When our string-crossing direction is “with the flow” our elbow has less requirement to move than when we bow “against the flow”. The “good” direction is simply much more ergonomically efficient than the “bad” direction. This can be easily observed when we play the above example with the two opposite bowings. Here below is another repertoire example, from the Prelude of Bach’s Sixth Suite. Try this one also with the two opposite bowings (starting with both the “unfavourable” downbow and the “favourable” upbow):

THE WRIST IN STRING CROSSINGS
We saw in Spiccato that the wrist has a definite preference for clockwise circles. This is not only relevant for spiccato but is also significant for string crossings. This means that it is not only the bow (for the mechanical reasons explained above) but also the wrist (for anatomical reasons) that has a natural preference for going down towards the lower strings after a downbow.
The only part of the bow in which the bow’s natural tendency is to fall “up” towards the higher strings, is at the frog. At the frog, however, we use mainly wrist and finger movement to change our bow direction. Thus, for a short downbow at the frog, even though we are in a part of the bow in which the centre of gravity makes the bow want to go towards the higher strings, the wrist preference for clockwise circles counteracts and makes it want to go towards the lower strings.
CHOICE OF BOW DIRECTION (BOWINGS): FOR THE BEATS OR FOR THE STRING CROSSINGS ?
On (and after) a downbow, the natural tendency for the bow is to want to fall down towards the lower strings whereas it wants to do the exact opposite on (and after) an upbow. When we manage to choose the bowings in such a way that the natural physical tendencies of the bow are perfectly matched to the music’s rhythmic impulse, then we are swimming downstream (with the current) and making life easy for ourselves. Here below is a perfect example of this situation, taken from the accompaniment to “Summer” from Vivaldi’s “Four Seasons”:

In the above example, the natural tendency of the bow with respect to both the string-crossings and the bounce coincides with its tendency to prefer a downbow on the beat. Often however, especially in faster string crossing passages, the natural desire for the down bow on strong beats contradicts the bow’s natural string crossing (and bouncing) tendencies. This creates situations in which we may want (or need) to use “reverse” (or “upsidedown”) bowings with respect to the beat (i.e we need to put upbows on the beat). Here, while the bowings are “upsidedown” with respect to the beat, they are however “correct” according to the bow’s natural string crossing (and bouncing) tendencies.

In the following variation of the first example above, the displacement of the beat to the lower string means it will now feel much more comfortable to play with an upbow on the beat:

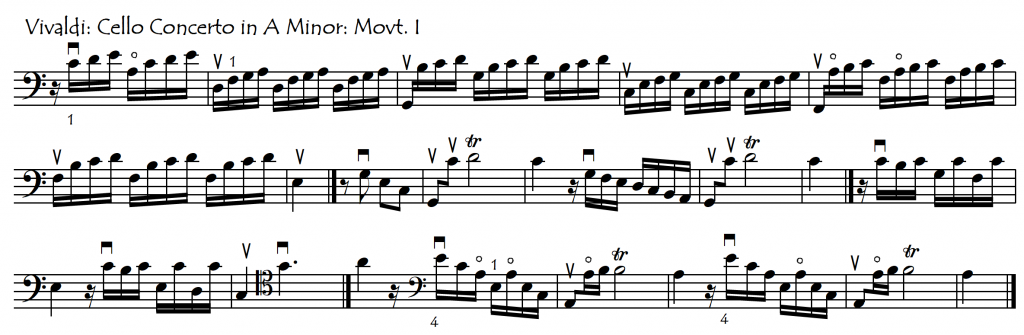
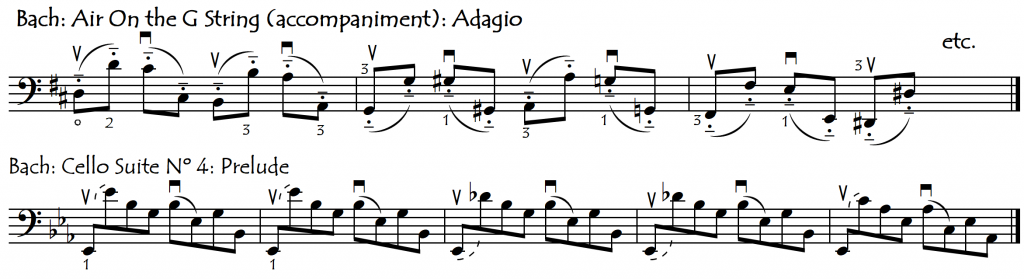
Here are some more repertoire examples of this situation. Try all these passages also with the opposite bowing, to see which is easier: bowing for the beat or bowing for the string crossings ?
All the above passages are fast. But the ergonomic advantages of bowing “with/for the crossing” can also be felt in passages at slower and moderate speeds, especially when our crossing is a big one (a “leap” across to a non-neighbouring string):
To get our bow in the favourable direction for the string crossings we will often have to “think outside the box” and bow “against the beat”. Sometimes this is very easy, for example by starting with an upbow on the beat as in the above two examples, or by simply making two consecutive bowstrokes in the same direction as in the following example:
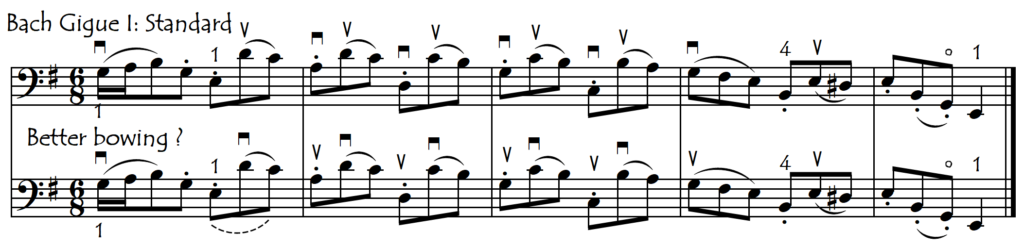
At other times we might need to actually change the articulations, adding a slur here and there in order to get our bow going in the correct direction for the crossings rather than for the beat (or for the composer). Sometimes these little slur additions can actually “improve” the music, adding a little variety to a “sewing machine” passage that was originally all in separate bows.
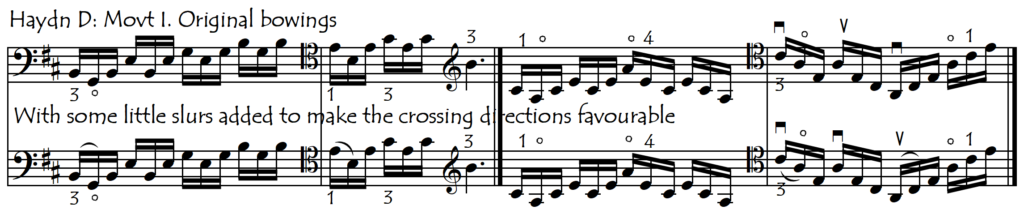
Let’s place these examples under the microscope now. In the following visual, the green enclosures indicate those crossings that are in the favourable direction whereas the red enclosures indicate crossings in the unfavourable direction. We can see that in the first of the above Haydn examples, the addition of our two slurs places all of the seven string crossings in the favourable direction whereas in the original, separate-bow version, six of the crossings were in the unfavourable direction. In the second example, our slurs place four of the crossings in the favourable direction and two in the unfavourable direction whereas the original version has these proportions reversed.
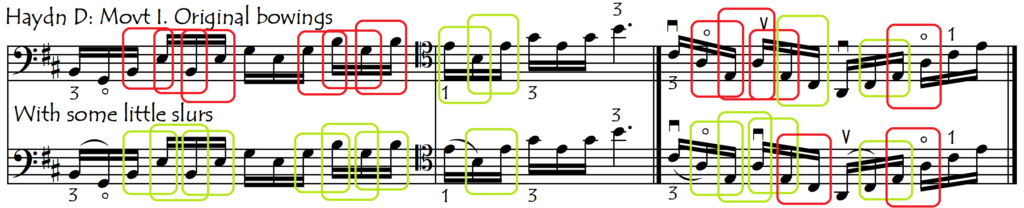
We have to decide whether adding the little slurs is worth it or not. At the very worst, these little bowing changes should be musically insignificant and unnoticeable for the listener. If the change in articulation disturbs or alters the music negatively then we will just have to practice our crossings in the unfavourable direction a bit harder !
In many circumstances, our decision about to whether to “bow for the crossing” or “bow for the beat” may be difficult to make because there are a lot more complications happening in the passage than in some of the preceding examples. Even though the bow prefers to cross down on (or after) a down bow and up on (or after) an up bow, often, because of other non-string-crossing factors, it will not really be clear which is the “best” bowing. Try the following passage also with the downbows on the beats, in which case our crossings are all in the unfavourable direction. Which is “better” ??

And even if we have a very clear idea of which bowing we prefer, very often we are unable, for various different reasons, to choose the bowing that we would really like to do in a certain passage. Therefore, we will always need to be able to play bowings that are “upside down” to the crossings, as well as bowings that are “upside down” to the beat. See also “Choosing Bowings“.