
Shifting Up To (and Down From) Thumbposition
Accustoming the hand to the thumbposition postures in all the fingerboard regions requires many hours of practice. This is not just a vital skill in itself but is also a prerequisite for comfortable and secure shifting into (and to a lesser extent, out of) thumbposition. As a general rule, only when we have achieved comfort in any one position can we expect to be able to shift into that position with ease. To say the same thing with other words, moving into the thumbposition (in any region) safely and comfortably requires practice, but if we are not at ease playing in that particular thumbposition, then it will be impossible to be at ease shifting into that thumbposition, no matter how much we practice our shifting.
Imagine an aeroplane: if it can’t cruise smoothly and easily, then how can we expect it to take off and land smoothly and easily? The first sections of the page Thumbposition Practice Material contain studies, exercises and repertoire excerpts to develop our high altitude cruising comfort (playing in Thumbposition). This is the material we need to work on as a prerequisite to shifting up and down from the thumbposition.
THE MOVEMENT OF THE THUMB BETWEEN BEHIND THE NECK AND UP ON THE FINGERBOARD
A shift to thumbposition implies, by definition, the need to place our thumb up on the fingerboard. A shift down out of thumbposition involves exactly the reverse procedure: now we need to take our thumb off the fingerboard and replace it behind the cello neck. Shifting into and out of thumbposition can be compared to takeoff and landing for a plane. As with flying a plane and bowing (see Bow Trajectory From the Air), these take-off and landing processes are critical moments, requiring special skills and great control. Continuing our flying analogy we could say that our thumb was the equivalent of a plane’s landing gear (wheels) ……. but used exactly in reverse. Whereas a plane needs its wheels to land, we cellists need to bring the thumb out (up) in order to be able to fly (high), and we normally tuck it away behind the neck as part of the landing process. When we come back down to the neck region, we are “coming home”, back to security, and at the same time, we are returning to a more natural hand posture (with the thumb behind the fingerboard). This is why for a cellist, unlike for a pilot, landing (coming back down) is not as difficult as taking off. And this is why this section is mostly concerned with the upward shifts into thumbposition: they cause more difficulties than the downwards shifts back towards home base.
The movements of the thumb, like those of the landing gear for a plane, are critical to this whole process so let’s look at how (and more importantly “when”) we put the thumb up and take it off the fingerboard.
LANDINGS: COMING DOWN OUT OF THUMB POSITION
Perhaps the most important component of a good cellistic landing is simply, while descending, to keep the thumb up on the fingerboard until the hand reaches the Neck Region. This means that we will go directly from thumbposition posture to neckposition posture, avoiding the “dangerous” Intermediate Region hand postures in which the constantly changing relationship of the thumb to the hand can be a considerable source of positional insecurity (bad intonation).

TAKE-OFFS: GOING UP INTO THUMBPOSITION
In contrast to the easy landings, shifting up into thumbposition for the cellist – especially to the Thumb Region – can be like a plane taking off from a runway surrounded by high mountains in thick fog with no navigational equipment. There are two essential prerequisites for a safe takeoff – in other words, for a safe, comfortable shift up into the thumb region:
- having a good idea of where our destination is, both physically (absolute physical Positional Sense) as well as aurally (Aural Imagination of the destination pitch)
- the early anticipation of the thumb’s release from behind the cello neck to allow its placement as early as possible (before or during the shift) up on the fingerboard. We will look now at this question in more detail.
THE TIMING OF THE THUMB’S MOVEMENT FROM BEHIND THE NECK TO UP ON THE FINGERBOARD.
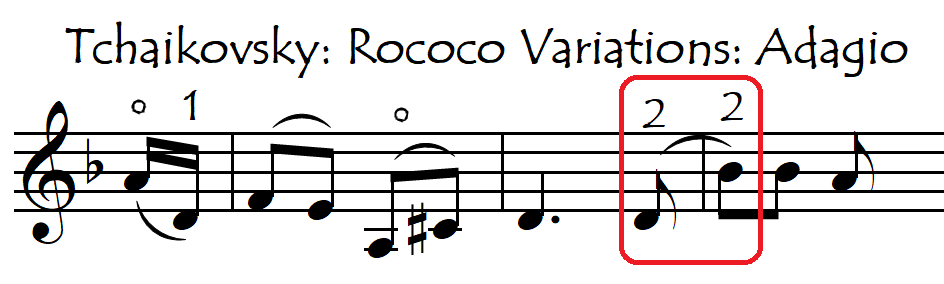
In the same way that a plane needs to deploy its landing gear before it actually lands, it often is very useful to bring the thumb up onto the fingerboard before we take off (i.e before we strictly need it). This is simple forward planning in which we are preparing the hand posture change into the thumbposition posture before the actual shift starts, in order to simplify to a maximum the shifting process. If we can get the thumb released from behind the neck and probably even placed on the fingerboard before our shift up, this means that we are no longer shifting “into” thumbposition, but rather that we are shifting “within” thumbposition. This sounds like a fussy verbal distinction but it isn’t at all. For the hand, this is a very important technical aid. Changes in hand posture during a shift are disruptive and can easily destabilise the shift. So, when possible, it is almost always preferable to get our hand as much as possible into the new position (posture) before we start the shift, especially in situations where the technical difficulties are greater after the shift than before it (e.g. shifting to a double stop or to an immediately rapid passage) and also in situations where we will be needing the thumb almost immediately after the shift. Here, the arrow indicates when (approximately) we may want to put our thumb up on the fingerboard.

There are however certain exceptions to this “rule”, especially for shifts up to thumbposition in the Intermediate Region. If we don’t need the thumb immediately after the shift, then we may decide that the discomfort of the thumb’s placement on the fingerboard before the shift is unnecessary (not worth it). In these cases we could simply release the thumb from behind the neck before the shift (rather than actually place the thumb on the fingerboard) and then place it up on the fingerboard after the shift.

Also, in very large shifts up from the Neck Region, the greater time and distance that we have with which to bring the thumb up onto the fingerboard reduces the need for awkwardly placing the thumb previous to the shift. This allows us to place it instead comfortably during the shift.
When however we are shifting up from the Intermediate Region, we can normally place the thumb on the fingerboard very comfortably before we actually start the shift. This early placement of the thumb is especially advantageous for smaller and/or faster shifts because during these shifts we have very little time and/or distance in which to perform this manoeuvre.

Click on the following link to find more Practice Material for Moving the Thumb On and Off the Fingerboard
POSTURAL CHANGES ON THE DIFFERENT FINGERS IN LARGE SHIFTS TO THUMB POSITION
In large, rapid displacements between the Neck and Thumb Regions, the hand’s posture must also change rapidly from “Neck Position Posture” to “Thumbposition Posture” (see Basic Thumbposition). This postural change affects the different fingers unequally. Whereas the third finger barely notices the difference, and likewise for the second finger, the first finger undergoes a significant change in angle and posture between the low and high regions because of the way the thumbs placement on the fingerboard turns the hand into “the violin position”. This means that large shifts on the first finger into thumbposition are probably going to feel more insecure (and need more practice) than the same shifts fingered on higher fingers. Try playing a few octave leaps up the fingerboard on each of the different fingers to see if this is true for you also.
FINGERING CHOICES TO GET UP INTO THE HIGH REGISTERS:
Sometimes, we can start our phrase directly in the higher register. In these cases, we have, by definition, enough time to tranquilly find and check our starting note before we actually sound it. Other times we don’t have this luxury and we need to “play our way” up to the higher regions. In these cases, we have a fingering choice to make: do we “spread the load” by climbing gradually up on the lower strings or do we stay in the lower positions as long as possible and then surge up the A string at the last moment ?

Three criteria will determine our choice:
- Technical security: can I do the one-string-version with security and reliability? (spreading the load often makes the passage easier).
- Musical style: is it more stylistically appropriate to play the passage on one string (with the corresponding audible, glissando shifts) or to make the register changes more discrete ?
- Sound quality: do I need the brightness of the A string throughout the whole passage ?
In an orchestral setting, the fact that we may have problems hearing ourselves can make large shifts more insecure (difficult to control). Orchestral fingerings might therefore tend to play it safe by moving up the lower strings and then staying “in position” up high, thus avoiding the big leaps.

CONCLUSION
After having worked on the two preliminary skills of:
Playing Comfortably IN Thumb Position and Moving the Thumb On and Off the Fingerboard
we can now easily work on:
Practice Material For Shifting Up Into (and Down Out Of) Thumb Position