
Scale/Arpeggio-Type Shifts
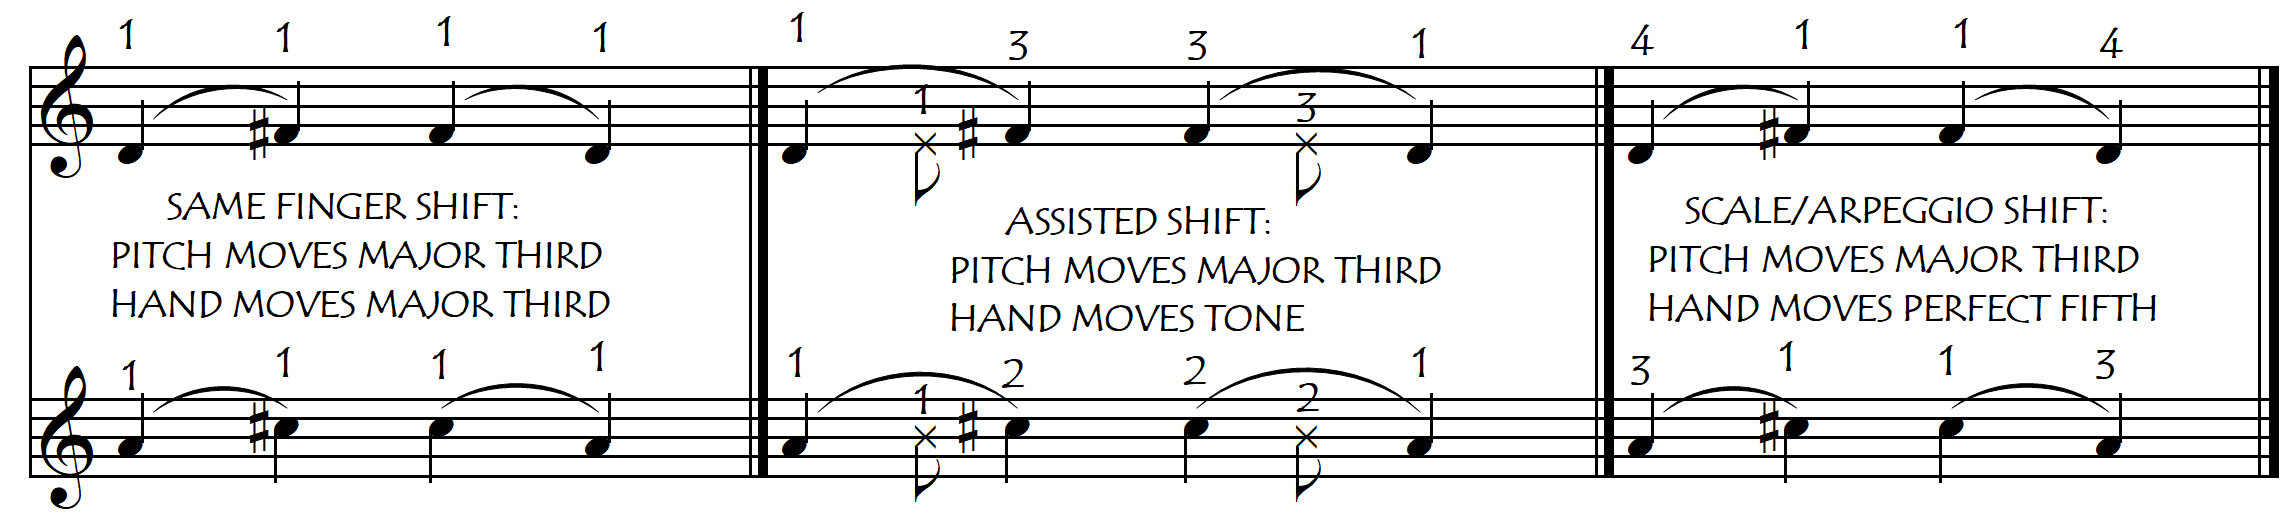
In Same-Finger Shifts, there is no change of finger, thus the hand moves exactly the same distance as the musical interval. In Assisted Shifts, the change of finger is in the same direction as the shift, thus the hand actually moves less distance than the musical interval. But in this third type of shift (that we have called Scale/Arpeggio-Type Shifts), the change of finger between the start-finger and the destination-finger is in the opposite direction to the shift, so in these types of shift, the hand must actually move a greater distance than the musical interval.
These differences are illustrated in the following examples in which the same major third interval is fingered differently three times, corresponding to the three different types of shifts:
Using the logic of the “Assisted Shift” terminology, we could have called these Scale/Arpeggio type shifts not only “Unassisted Shifts” but even “Overshifts” or “Penalised Shifts”. Why then would we want to use this type of “inefficient” shift, in which we move the hand so much more than is needed for the musical interval that we are playing? Obviously, this is because we are going to need the other notes of the new hand position, immediately after the shift, and it is in fact more efficient to do one bigger shift than several consecutive smaller shifts. So these shifts could actually be called “Thinking Ahead Shifts” or “Forward Planning Shifts” !!

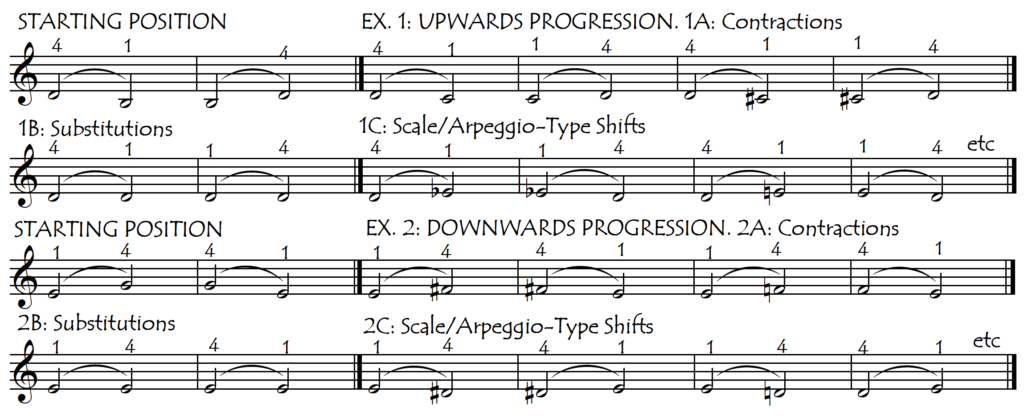
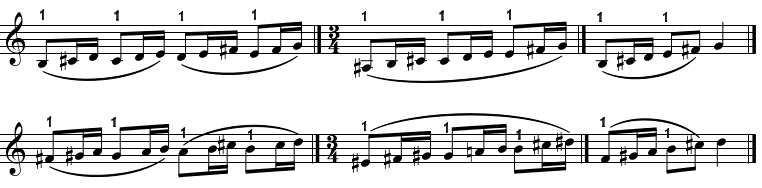
Scale/Arpeggio-Type shifts are the most complicated shifts conceptually, but there is a simple progressive path to understanding them and to making them easy. These shifts are basically just a contraction movement that is continued further and further in the same direction. As the contraction movement continues, it becomes a finger substitution. When that movement continues even further in the same direction it becomes a Scale/Arpeggio-type shift. This progression can be seen in the following examples:
The following examples illustrate this progression in more detail:
Let’s look now in great detail at one of these shifts in order to see these component movements more clearly. We will use as our study example, one of the “hardest” shifts of this type to play beautifully – a very slow, slurred semitone scale shift between the highest and first fingers – as this will teach us the most.

First of all, we start the shift with a contraction. Even though this word is normally associated with tension, on the cello it is quite the opposite. Here “contraction” means simply to let the hand relax from its opened-out “working posture”, allowing the fingers to come together, relaxing back into their most natural and most relaxed position, in which they are touching each other. Simply with that relaxation, we have already gained at least a semitone in the shift direction. This is very important in fast passages because in fast shifts we need to reduce the shift distance as much as possible in order to be able to play the passage quickly and fluidly:

After the preliminary hand contraction, we start the actual shift. But on which finger do we shift – the “new” finger, the “old” finger, or the middle fingers? To look at this question we will need to slow our shift down greatly, as if we were doing it under a microscope and in slow-motion.
Ideally, for the ultimate smooth fluid slow shift, we actually shift on all the fingers that are found between the starting and destination finger of the shift !! This happens progressively, successively, from the start finger to the destination finger, passing through all the other fingers in between. In the case of our example, there is a “triple finger substitution” during the shift. In the upward shift, the order of substitution is 4-3 then 3-2 followed by 2-1. In the downward shift, the order is the reverse: 1-2, then 2-3, followed by 3-4. This process of finger substitutions occurs during the glissando, and no note should ever sound that is outside the range of the shift. This gives a glissando that sounds identical to that of a same-finger shift.
And this is why our example – a semitone shift between the two most distant fingers – is the hardest to do well: because there is only one semitone distance in which to do this triple finger substitution so smoothly that it sounds like a one-finger semitone shift even though it is in fact a shift of a major third involving all four fingers. Yes, decidedly a cellist is often like a magician.
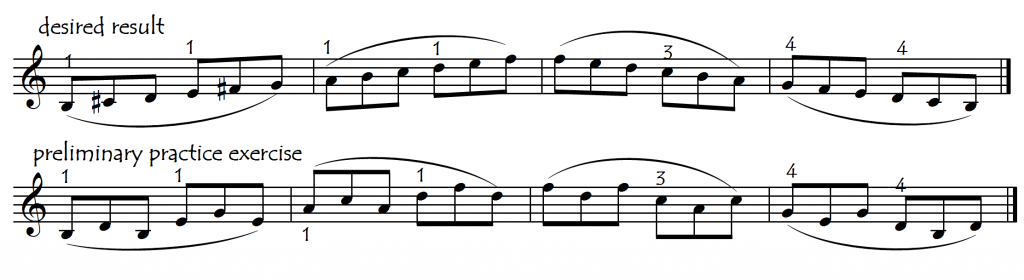
To illustrate this “triple finger substitution better, look at the following example where we can write out the “intermediate notes” corresponding to each finger. In this example we use a musical shift of one tone (corresponding to a hand shift of 3 tones) because this allows us to have a different note for each of the different fingers in the glissando and is thus easier to understand.

In the first example (first two bars) the finger substitution is distributed equally between the start and destination notes. Bars 3-4 and bars 5-6 show the two opposite two extremes, in which the finger substitution is done respectively at the beginning or at the end of the shift. This may seem excessively fussy and detailed and it most certainly is, but it’s just a little exploratory game to help us to understand this complex shifting process. From the above examples, we can see how working on Contractions and Finger Substitutions is a good preparation for mastering this type of shift. Obviously, in faster shifts, we don’t have time to do all this careful stuff, but for slow expressive shifts, these details can make a lot of difference.
The impulse for these shifts usually comes from the new (destination) finger and it can help to imagine that this new finger is “sweeping” the other fingers out of its path. This “sweeping” finger substitution can be facilitated by a rolling motion of the hand which accompanies the shifting movement of the arm. The supreme importance of the destination finger in these shifts means that being very good at our Same-Finger shifts upwards on the lower fingers (and downwards on the higher fingers) is an absolute prerequisite for successful Scale/Arpeggio shifts.
All exercises (or music) that develop these Same-Finger shifting skills will have a strong positive effect on our Scalic/Arpeggio shifting. The following highlighted link opens up 2 pages of these Preliminary Same-Finger Shifting Exercises
DIFFERENCES BETWEEN SHIFTING UPWARDS AND SHIFTING DOWNWARDS
The concept of the “sweeping movement” that we spoke about above, applies especially to ascending shifts, because our destination finger (a lower finger) is already down on the string before the shift. Also, when we shift upwards, because of the fact that the lower finger is already in contact with the string, it does not, therefore, need to be rearticulated in order to stop the string (although it can be if we want that clarity of rhythmic articulation). Try the following exercises – contraction, substitution and shift – both with and without a clear articulation of the first finger in the new position.
By contrast, when we shift downwards, we have no choice: we must place (articulate) the new finger on the string from the air. So we now have an additional question (problem): how and when will we do this finger placement (articulation): with a hammered, on-time articulation exactly on the arrival note, or with a smooth glissando into the arrival note on the new finger (which requires a more gentle, anticipated placement of the target finger during the shift) ? This is exactly the same question that we have with respect to our upward Assisted Shifts.
For a smooth, beautiful, lyrical, vocal-style, legato downwards shift, we will need to use the rolling progressive finger substitution that we spoke about above. This is the only way we can get a vocal glissando.

However in a faster (or simply more articulated passage), we don’t need (or even want) this glissando, so in these circumstances we will probably place the higher finger on the string with a fast and clear articulation, directly on the destination note, as we would do in a descending contraction or finger substitution. For a downward shift we can decide between these two possibilities. For a downward contraction or substitution however, we almost always do the crisp articulation as we only very rarely want to have a downward glissando in these note changes.

In the following example, the same note sequence is presented with two different articulation styles. In the first two (legato) examples we will probably want to do a smooth shift whereas in the second two examples we will most probably want to do the rapid crisp articulation.

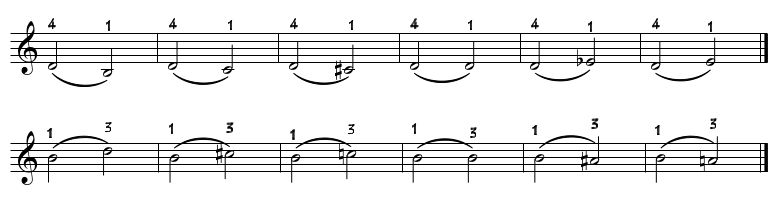
For more specific practice material for these types of shifts across all the fingerboard regions, click on the following links:
Most Basic Exercises (including all the examples from this article)
Substitutions: All Fingers: EXERCISES
Stepwise (Scalic) Shifts Between First and Middle Fingers: EXERCISES
Stepwise (Scalic) Shifts Between Middle and Top Fingers: EXERCISES
Stepwise (Scalic) Shifts Between First and Top Fingers: EXERCISES
Stepwise (Scalic) Shifts: THE ULTIMATE SCALE EXERCISE
Arpeggio Shifts: 2-1 Major Thirds: No Extensions: EXERCISES
Arpeggio Shifts: 2-1 Minor Thirds: With Extension: EXERCISES