Moving the Thumb On and Off the Fingerboard
Releasing the thumb from its position behind the cello neck and bringing it up onto the fingerboard is not only an essential component of playing in Thumbposition in the lower (Neck and Intermediate) fingerboard regions but is also an essential component of all our Shifting up into Thumbposition (in any region).
When shifting up into thumbposition, as a general rule, it is useful to get the thumb up onto the fingerboard before the shift, as the separation of our two tasks (first placing the thumb up on the fingerboard, then doing the shift) allows our brain to occupy itself with one thing at a time. The arrow indicates (approximately) when to bring the thumb up:

This subject is dealt with in detail on the Shifting up into Thumbposition page.
Likewise, the reverse process is equally necessary: when shifting down from thumbposition back into the neck and intermediate regions we need to be able to comfortably remove the thumb from its position on top of the fingerboard and place it behind the cello neck. But, unlike for our shifts up into thumbposition, for our shifts down out of thumbposition we cannot normally prepare the new position of the thumb because the thumb cannot be placed behind the cello neck until we are already down at least as far as the intermediate region. Fortunately, this inability to prepare the thumb’s new position behind the cello neck in downward shifts is not a problem because downward shifts to the neck region normally feel more natural and easy than upwards shifts into thumbposition. When we come down, it is as though we were coming home or “back to earth”.
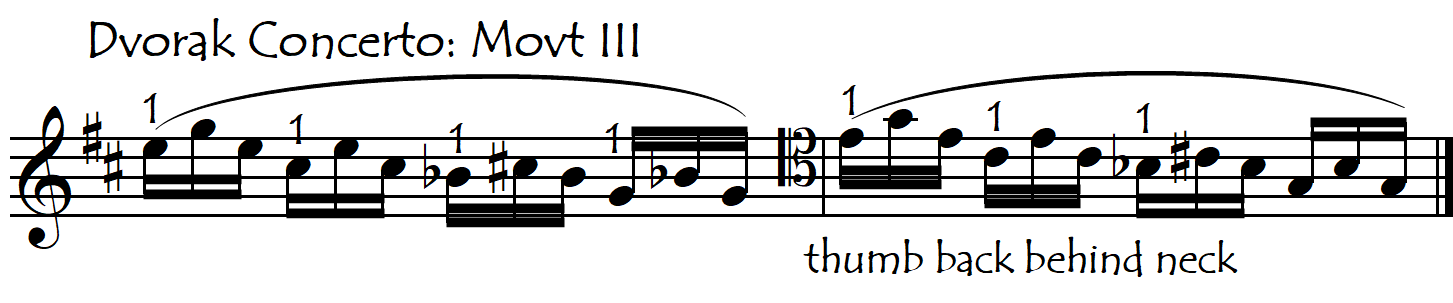
When we are shifting from thumbposition in the intermediate region down to the neck region it is often possible (and can be useful) to prepare the thumb’s new position behind the cello neck. In the following example, the arrow indicates the removal of the thumb from up on the fingerboard and its placement behind the cello neck, in anticipation of the shifts down:

But before working on thumb placement and removal in shifts, it is a good idea to work on this skill in its most basic, simple form: without any shifting. Like this, we can concentrate exclusively on what our thumb is doing, without having to think about any changes of position. Here below is some practice material to work on this skill.
Moving The Thumb On and Off the Fingerboard in the Neck and Intermediate Regions: No Shifting: REPERTOIRE EXCERPTS
THE THUMB AND THE OPEN STRING
Unlike the other fingers, we very rarely need to articulate the thumb. We only ever need to articulate the thumb if we wish/need to play it after an open string, which most commonly occurs when we are using Thumbposition in the Neck Region. Placing the thumb “from midair” is a tricky and dangerous task because the hand is “lost in space“. If, however, we have another finger already stopping a neighbouring string this makes our task much easier because that finger serves as our positional reference and hand-stabiliser. The following link opens up some exercises for working on these two types of situations:
Thumb Placement After Open String: EXERCISES
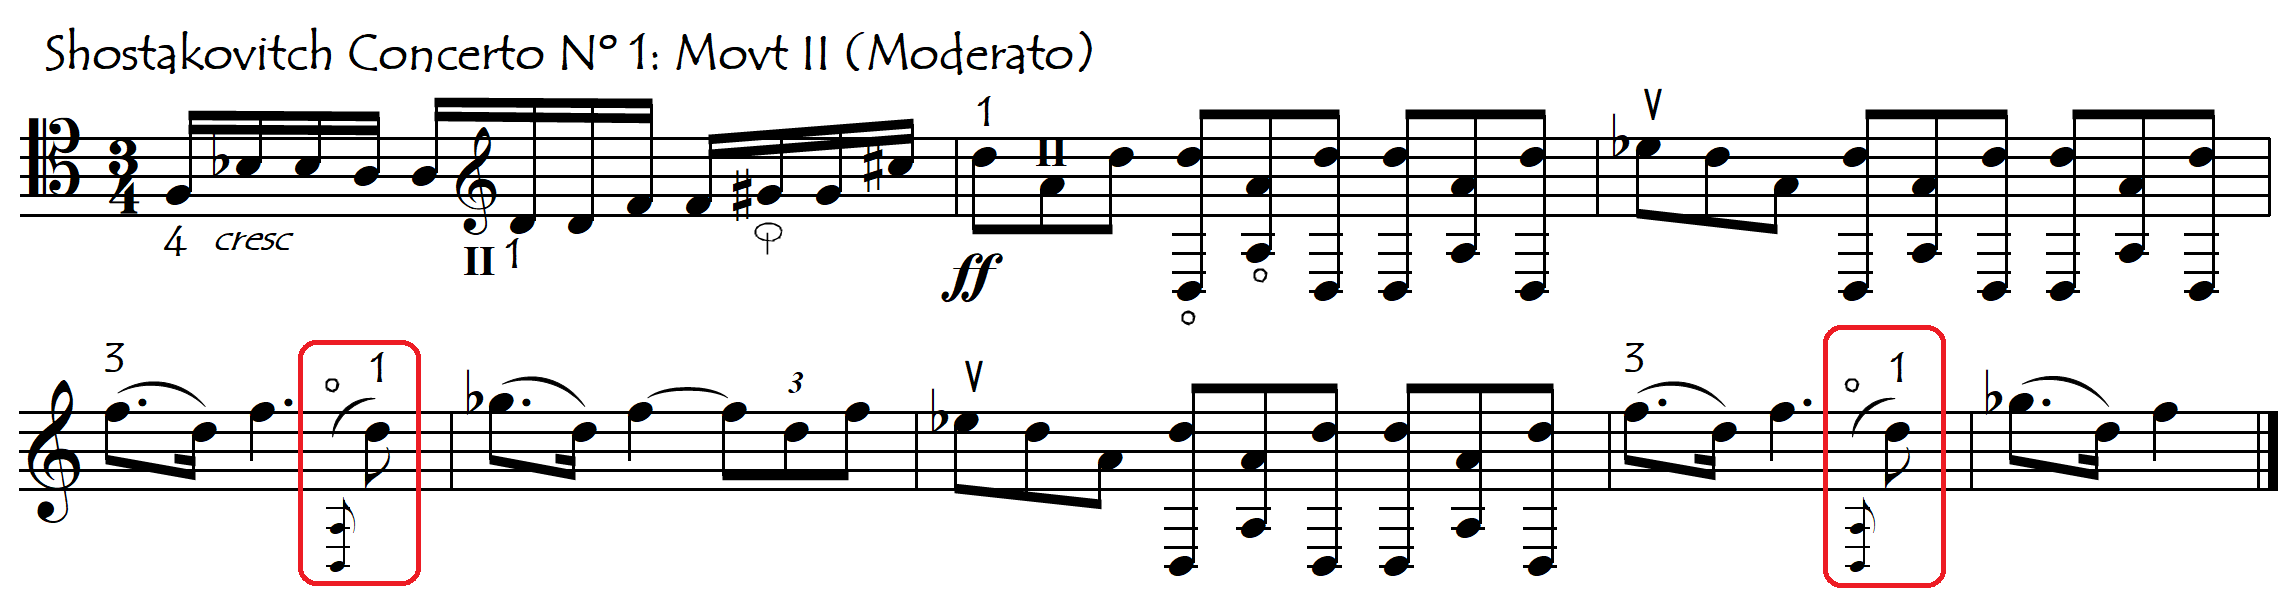
A RARE CURIOSITY: PLACING THUMB UNDER FINGERBOARD IN THE THUMB REGION
Just for fun, have a look at this passage, for which we might want to move the thumb to under the fingerboard, even though we are playing in the Thumb Region. Because we need to sound the open strings, we can’t keep the thumb on the fingerboard. But if we simply allow it to float freely in the air we will find ourselves in the dangerous situation (lost in space) of losing all contact with the fingerboard when we remove the fingers to play the open strings shown in the red enclosures: