
Scale/Arpeggio-Type Shifts in Thumbposition
This page is a sub-article of both the “Scale/Arpeggio-Type Shifts and “Shifting Within Thumbposition” articles.
Before looking at larger (arpeggio interval) shifts, we will look at the smaller, stepwise shifts of scales.
SCALIC SHIFTS:
From the point of view of scale fingerings, in thumbposition, the cello becomes like a violin. In thumbposition, because we have all the notes of the scales within our hand range, we have a huge variety of possible scale fingerings, up and down the same string and also across the strings:

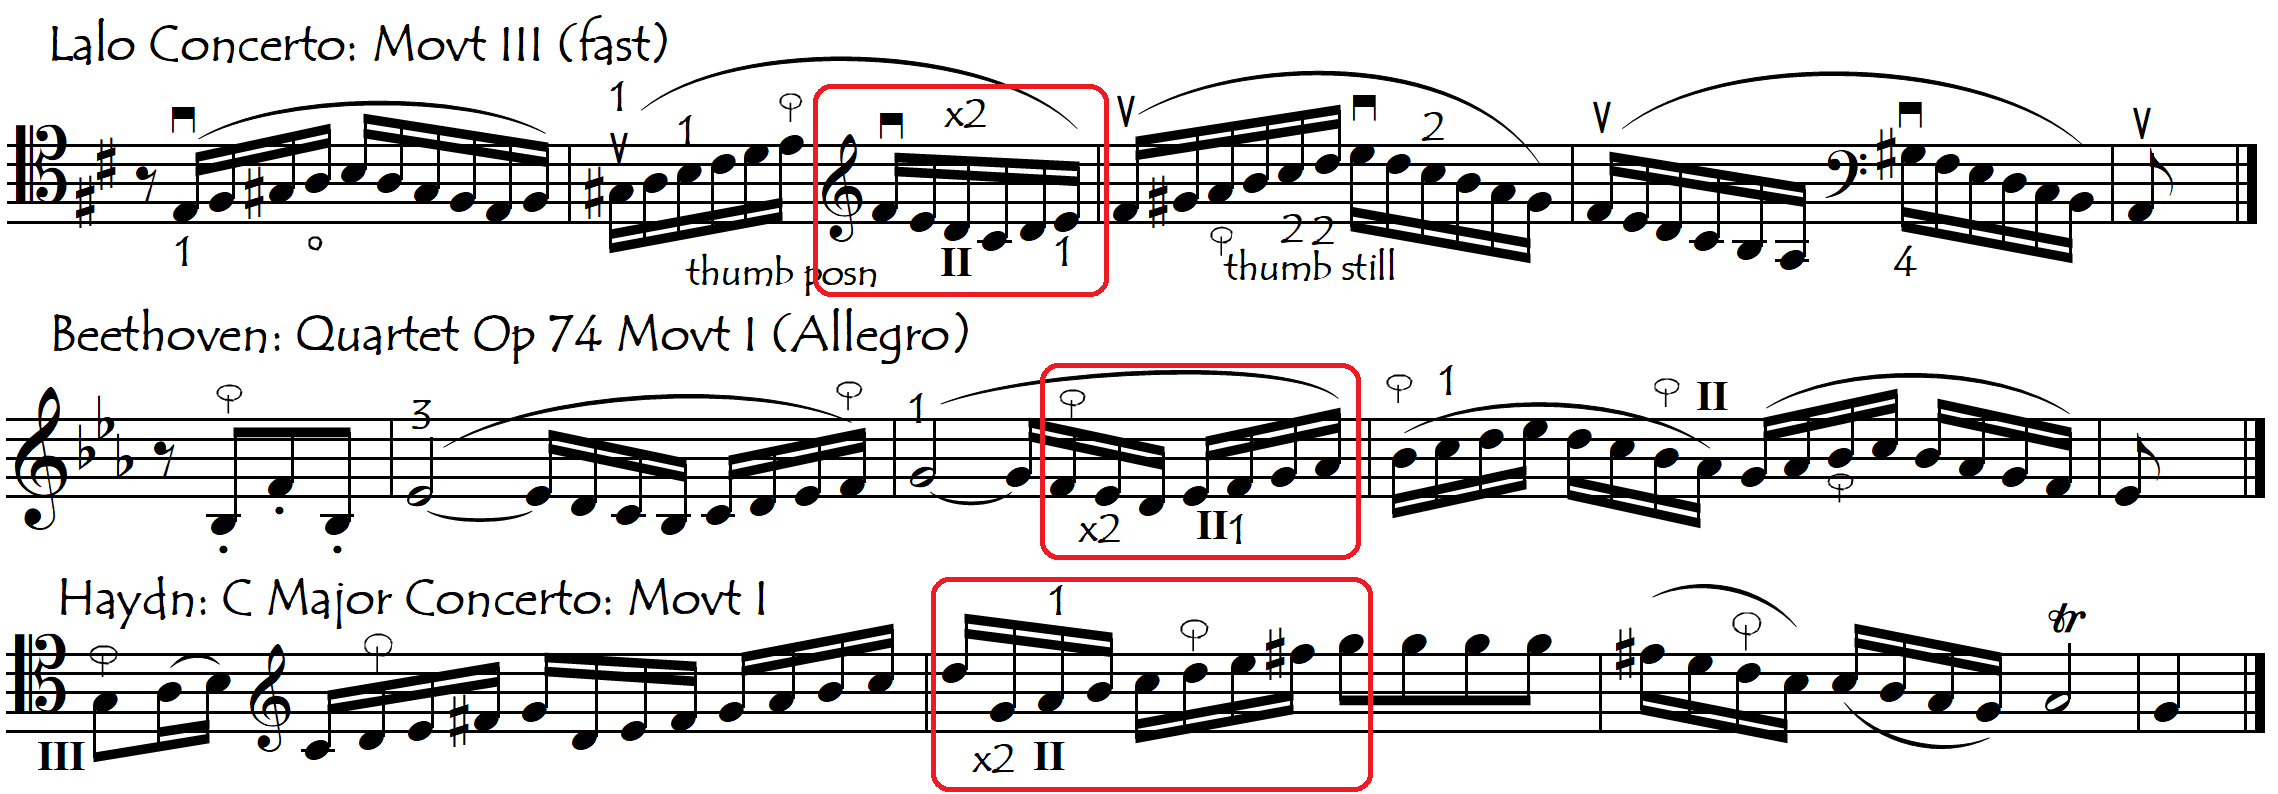
Here below are some of the many possible fingerings that we could use for the highlighted scale:

There are six possible finger pairings for scale/arpeggio-type shifts in thumbposition:
1st finger/2nd finger
1st finger/3rd finger
2nd finger/3rd finger
1st finger/thumb
2nd finger/thumb
3rd finger/thumb
On this page, we will not be looking at shifts involving the thumb. All scale/arpeggio-type shifts up to, or down from, the thumb are looked at on their own dedicated page “Scale/Arpeggio-Type Shifts Involving The Thumb“. On this page, we will look only at those shifts in which the thumb is used before or after, but never during the shift. Let’s now look at these non-thumb finger combinations, one by one, but first, we will lay them out side by side to see and feel the differences when we play the exact same scale but with each of the three different finger pairs used for the shifts:

FIRST AND SECOND FINGERS:
This is the easiest finger combination for scale/arpeggio shifts in thumbposition for several reasons:
- the first finger is the strongest finger
- this finger pair concerns two adjacent fingers (they could not be closer together) which makes it easier to measure the shift distances
- the thumb is very easy to position in relation to the first finger
Second Finger/First Finger Scalic: EXERCISES
Second Finger/First Finger Arpeggios: EXERCISES
FIRST AND THIRD FINGERS:
With this finger combination, we have the advantages that the first finger is our strongest finger and that it is easiest to position our thumb relative to the first finger, but we have the disadvantage that these two fingers are further apart (non-adjacent) which means that the shift distances are a little more difficult to measure because the hand is travelling further. But this fact that the hand travels further means also that we need fewer shifts to cover the same distance compared to when we do our scalic shifts to adjacent fingers. In the previous example, we only needed four shifts for the 1-3 finger combination whereas we needed six shifts for the 1-2 and 2-3 finger combinations.
Sometimes we can use certain fingering tricks which substitute the more difficult 3/1 scale shift for an easier 2/1 shift, while simultaneously shortening the shift distance:
Third Finger/First Finger Scalic: EXERCISES
Third Finger/First Finger Arpeggios: EXERCISES
SECOND AND THIRD FINGERS:
With this finger pair, the advantage of the two fingers being right next to each other (adjacent) is somewhat outweighed by the fact that the thumb is further away from the second finger than it is from the first finger. This means that in an upwards shift from the third to the second finger, finding the new position of the thumb (using the second finger as reference) is not quite as easy (accurate) as when we do our upward shifts to the first finger.
Second Finger/Third Finger Finger Scalic: EXERCISES
Second Finger/Third Finger Arpeggios: EXERCISES